Posts

Showing posts from February, 2023

DIY Motion-Activated Relay Control using Arduino
Image
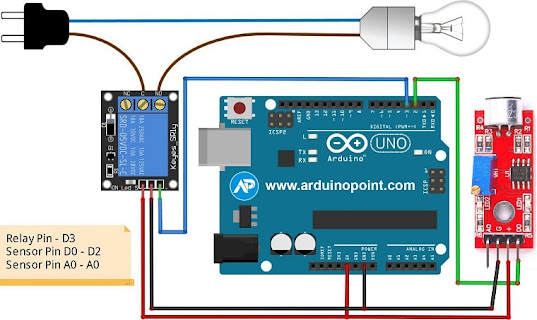
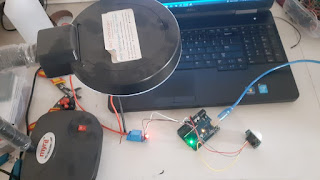
  Introduction Have you ever wanted to create a simple motion-activated project using Arduino? In this tutorial, we'll guide you through building a motion-activated relay control system using a Passive Infrared (PIR) sensor and an Arduino board. This project is perfect for beginners and provides a hands-on introduction to working with sensors and actuators. Components Needed Arduino board (e.g., Arduino Uno) Passive Infrared (PIR) sensor Relay module Jumper wires Breadboard Wiring the Components First, let's set up the hardware. Connect the PIR sensor and relay module to the Arduino as follows: PIR sensor: Connect the sensor's VCC pin to 5V on the Arduino. Connect the GND pin to GND on the Arduino. Connect the OUT pin to digital pin 5 on the Arduino. Relay module: Connect the VCC pin to 5V on the Arduino. Connect the GND pin to GND on the Arduino. Connect the IN or signal pin to digital pin 6 on the Arduino. Ensure that your connections are secure and double-check the speci...

what is optocoupler?😎

Image
  Definition: An optocoupler, also known as an opto-isolator or photocoupler, is a type of electronic component that is used to isolate two circuits electrically while allowing them to communicate with each other optically. Explanation: An optocoupler consists of a light-emitting diode (LED) and a photodetector (usually a phototransistor or a photodiode) that are housed in a single package. The LED emits light when a current is applied to it, and this light is then detected by the photodetector, which converts it back into an electrical signal. The two circuits that need to be isolated are connected to the optocoupler in such a way that the LED is part of one circuit and the photodetector is part of the other circuit. When the LED is turned on, it emits light that is transmitted across the isolation barrier to the photodetector, which then generates a corresponding electrical signal that can be used by the second circuit. Uses: Optocouplers are used in a wide range of applications ...

Harnessing the Power of Capacitors: An Insightful Overview

Image
Unveiling the Basics: At the core of electronic systems lies a humble yet powerful component – the capacitor. Functioning as an energy storage device, capacitors store electrical energy in an electric field created between two conductive plates. These plates are separated by a non-conductive material known as a dielectric. How Capacitors Work: When a voltage is applied across the capacitor plates, an electric field emerges. This prompts electrons to accumulate on one plate while being drawn away from the other. This separation of charge creates a potential difference, or voltage, across the capacitor. This voltage is directly proportional to the amount of charge stored on the plates. Common Applications in Electronic Circuits: Capacitors play a versatile role in electronic circuits, serving various purposes: Filtering: Capacitors are employed to filter out unwanted signals or noise, ensuring a cleaner output. Timing: In combination with resistors, capacitors control the timing of signa...

FERRITE BEADS OVERVIEW

Image
 WHAT IS FERRITE BEADS? Ferrite beads, also known as ferrite cores, are small, cylindrical or bead-shaped components made of ferrite material. Ferrite is a ceramic material that is composed of iron oxide and other metals, which gives it magnetic properties. Ferrite beads are commonly used in electronics to suppress high frequency noise or interference in electronic circuits.                                      They work by creating a high impedance at the frequency of the noise, which effectively blocks it from entering or leaving the circuit. The beads are placed around a wire or cable, and the wire is passed through the center of the bead. The magnetic field generated by the ferrite material effectively absorbs the high frequency noise, preventing it from interfering with other circuits or equipment. Uses: Ferrite beads are used in a variety of electronic applications, i...

Popular posts from this blog

DIY Door Lock Security System with Arduino and Keypad: A Step-by-Step Guide

Interfacing Ultrasonic Sensor, Relay Module, and 16x2 I2C LCD with Arduino

DIY Motion-Activated Relay Control using Arduino